

Article Abstract
A Rigid Box Machine is often the difference between “premium-looking” packaging and costly rework: bubbles, wrinkles, uneven folds, misaligned wraps, glue marks, and inconsistent corners can quietly destroy yields and delivery schedules. This guide breaks down what causes those defects, which machine functions prevent them, and how to evaluate a rigid box setup based on real production pain points— changeovers, operator dependency, material waste, and quality control.
You’ll also get a practical buying checklist, a comparison table of common automation levels, and an FAQ you can share with your team. The examples reflect typical factory workflows: clear process logic, measurable criteria, and decision support rather than empty marketing claims.
Table of Contents
Outline
- Identify the top 7 production pain points for rigid boxes and their root causes
- Map each pain point to the machine functions that reduce risk
- Compare automation levels with a quick decision table
- Use a checklist to evaluate suppliers, training, and after-sales support
- Finish with a deployment plan and an FAQ (plus optional FAQ structured data)
Where Rigid Box Production Usually Breaks Down
Rigid boxes look simple from the outside, but the finishing tolerance is unforgiving. The most common “silent killers” in production aren’t dramatic machine failures— they’re small inconsistencies that compound over thousands of units.
| Buyer Pain Point | What You See on the Line | Typical Root Cause | What a Rigid Box Machine Should Solve |
|---|---|---|---|
| High reject rate | Wrinkles, bubbles, corner tears, skewed wraps | Unstable positioning, uneven pressure, inconsistent glue application | Accurate positioning + controlled wrapping pressure + stable gluing |
| Too much operator dependency | “Only one person can run it well” | Manual alignment steps, no repeatable job memory, unclear setup logic | Guided setup, parameter recipes, sensors for repeatability |
| Slow changeovers | Hours lost between box sizes | Mechanical adjustments, trial-and-error, no quick reference standards | Quick-change tooling + parameter presets + clear reference marks |
| Material waste | Over-gluing, misfeeds, damaged wrap paper | Glue overrun, unstable feeder, poor tension control | Consistent feeding + glue control + stable conveying |
| Premium look not consistent | Edges vary, corners look “soft” | Pressure imbalance and corner-forming inconsistency | Reliable edge folding + corner pressing consistency |
Reality check: If your rigid box quality depends on “hand-feel” and constant manual corrections, you’re not scaling—your team is just heroically compensating.
A properly configured Rigid Box Machine reduces that dependency by making alignment, pressure, and glue repeatable.
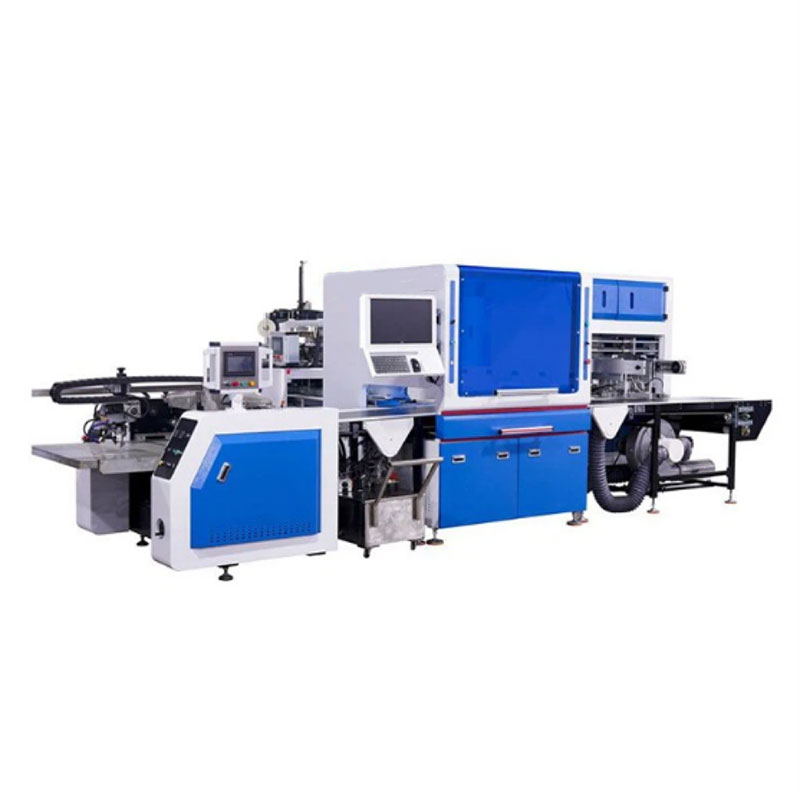
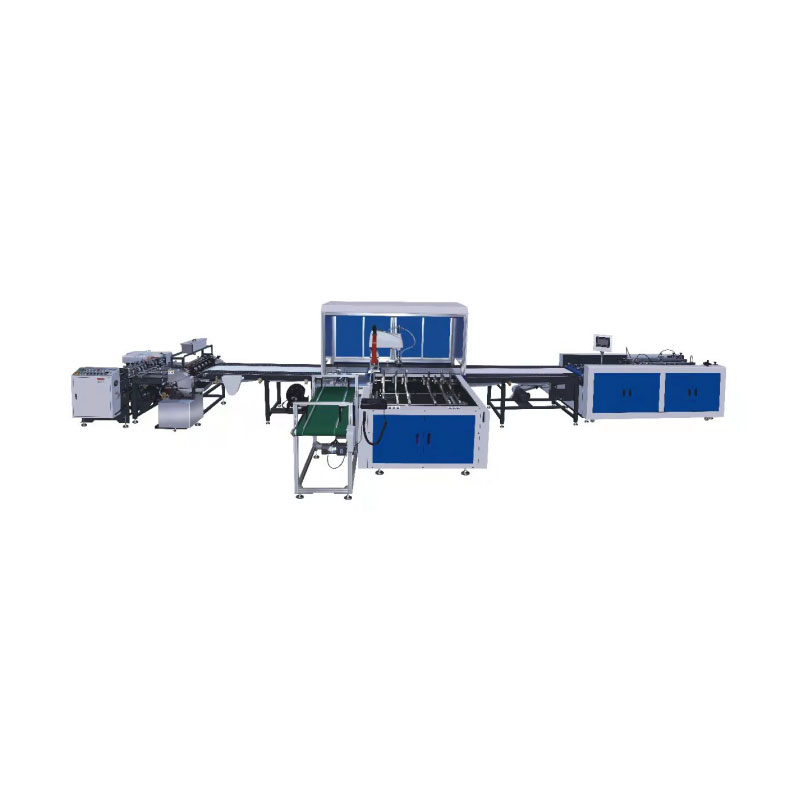
What a Rigid Box Machine Actually Does
In a typical workflow, rigid box manufacturing includes board forming (the box structure) and wrapping (the outer paper that gives the box its premium finish). A modern Rigid Box Machine focuses on repeatable wrapping and forming steps that are difficult to standardize manually at volume.
Core functions you should expect
- Feeding and conveying: Stable feeding for box shells and wrap paper to prevent skew and scratches.
- Gluing system: Controlled glue application (often cold glue; sometimes hot melt in specific steps) to reduce marks and warping.
- Positioning/alignment: Accurate registration between the box shell and the wrap paper.
- Wrapping and edge folding: Even pressure and consistent fold angles to avoid bubbles and edge lift.
- Corner forming/pressing: A consistent corner finish that looks sharp, not “puffy.”
- Control interface: PLC + touchscreen parameter control to repeat jobs with less guesswork.
Where Wenzhou Feihua Printing Machinery Co., Ltd. fits in
If you’re evaluating equipment suppliers, Wenzhou Feihua Printing Machinery Co., Ltd. is one of the manufacturers offering rigid box solutions aimed at premium packaging production. When you talk to any supplier, focus on measurable outcomes—yield stability, changeover time, and defect reduction—rather than only “top speed.”
Quality Controls That Matter Most
“Quality” isn’t a single switch—it’s a set of controls that prevent specific defects. Below are the controls that typically deliver the highest ROI in rigid box finishing.
Glue consistency
Avoids glue marks, warping, edge lift
Avoids glue marks, warping, edge lift
Pressure uniformity
Reduces bubbles, wrinkles, soft corners
Reduces bubbles, wrinkles, soft corners
Accurate positioning
Prevents skewed wraps and uneven borders
Prevents skewed wraps and uneven borders
Stable feeding
Cuts misfeeds and paper damage
Cuts misfeeds and paper damage
Repeatable settings
Shortens learning curve and changeovers
Shortens learning curve and changeovers
Operator safety & guarding
Protects people and reduces downtime risk
Protects people and reduces downtime risk
A simple way to test “premium consistency” before you buy
- Choose two box sizes you run often (one “easy,” one “annoying”).
- Run multiple paper types (coated + textured, if applicable).
- Ask for a short changeover demonstration and time it.
- Inspect corners under strong light: look for micro-wrinkles, edge lift, and glue shadowing.
- Calculate yield: not only rejects, but also “acceptable but not premium” units.
Automation Levels and When Each Makes Sense
Not every factory needs the same automation level. The right choice depends on order mix, labor costs, and the brand tolerance for cosmetic variation. Use the table below to align equipment capability with your actual workload.
| Automation Level | Best For | Strength | Watch-Out |
|---|---|---|---|
| Entry / Semi-automatic | Lower volume, fewer SKUs, skilled operators available | Lower initial cost, simpler maintenance | Quality may depend heavily on operator technique |
| Mid automation | Growing brands, mixed sizes, moderate volume | Better consistency, faster changeovers | Requires disciplined setup standards to unlock benefits |
| High automation | High volume, premium cosmetics, tight lead times | Higher repeatability, reduced labor sensitivity | Higher CapEx; ensure strong training + after-sales support |
Buyer mindset shift: Don’t buy a Rigid Box Machine just to “go faster.”
Buy it to produce the same premium box on Monday and Friday, with different operators, without a quality roller coaster.
Material Compatibility and Cost Traps
Material choices make or break rigid box profitability. Many defects blamed on “the machine” are actually glue/paper/board mismatches. Before you finalize a machine configuration, clarify your material range and tolerance window.
Common materials you should validate during trials
- Wrap paper: coated paper, art paper, specialty textured paper, laminated paper (if used)
- Board thickness range: the chipboard/greyboard you standardize for different box sizes
- Adhesive behavior: drying time, viscosity stability, temperature sensitivity
- Finishing constraints: foil, emboss/deboss, spot UV—these can amplify cosmetic defects
Hidden cost traps (and how to avoid them)
- Trap: Over-gluing “to be safe” → Fix: tune glue volume and spread; train operators to recognize glue shadowing early.
- Trap: Paper cracking on corners → Fix: confirm paper grain direction and folding parameters; test “worst-case” humidity.
- Trap: High SKU mix without presets → Fix: insist on recipe storage and clear changeover SOPs.
A Buyer’s Selection Checklist
If you want a supplier conversation that stays grounded, use this checklist. It’s designed to protect you from vague promises and keep the evaluation measurable.
Technical fit
- Target box size range and minimum/maximum height you must support
- Material compatibility (wrap paper types, board thickness range, adhesive behavior)
- Registration accuracy expectations (especially for printed wraps with borders)
- Corner finish requirements (brand “premium look” definition)
Operational fit
- Changeover time target (your real KPI, not “best case”)
- Operator training plan and documentation quality
- Spare parts availability and lead time
- Remote support ability and troubleshooting workflow
Questions to ask any supplier
- “Show me defect samples and explain how you diagnose the root cause.”
- “What settings do you store per job, and how do you prevent operator drift?”
- “Which wear parts affect quality first, and what’s the preventive schedule?”
- “If a box looks fine at speed 1 but fails at speed 2, what changes?”
If a supplier can’t explain defects in a calm, technical way, you’ll end up paying for the learning curve yourself.
A good Rigid Box Machine supplier should be fluent in process control, not just sales language.
Implementation Tips for a Smooth Ramp-Up
Buying a machine is only half the win. The faster you stabilize setup and quality routines, the faster your ROI arrives. Here’s a practical ramp-up plan used by many packaging teams.
Week 1: Standardize your “golden sample”
- Define what “premium” means in your QC terms: corner sharpness, border symmetry, glue visibility, surface flatness.
- Photograph accepted samples under consistent lighting; store them at the line as references.
Week 2: Lock a repeatable setup routine
- Create a short setup sheet per SKU: box size, wrap paper spec, glue settings, pressure settings, inspection points.
- Use machine parameter recipes when available; reduce trial-and-error.
Week 3–4: Train for diagnosis, not just operation
- Teach operators to map defects to causes (pressure vs. glue vs. alignment).
- Track rejects by defect type; don’t lump everything into “wrinkle.”
Ongoing: Preventive maintenance that protects quality
- Check feeding and conveying contact points for debris and wear.
- Keep gluing components clean and consistent; viscosity drift causes “mystery defects.”
- Calibrate alignment references on a schedule, especially after mechanical adjustments.
FAQ
What should I prioritize first when buying a Rigid Box Machine?
Prioritize repeatability (positioning, glue consistency, pressure control) and changeover time for your real SKU mix. Speed matters, but stable premium cosmetics usually matter more for profitability.
How do I reduce wrinkles and bubbles in rigid box wrapping?
Wrinkles and bubbles usually come from pressure imbalance, unstable alignment, or inconsistent glue. During trials, test multiple wrap papers and verify that folding pressure and glue volume remain stable across a full run—not only the first 20 pieces.
Is a fully automatic Rigid Box Machine always better than semi-automatic?
Not always. If you run small batches with frequent size changes, a thoughtfully configured mid-automation setup can outperform a high-automation line that takes too long to change over. Match automation to order mix and labor reality.
What documents should a supplier provide to support decision-making?
Ask for clear manuals, recommended maintenance schedules, defect troubleshooting guides, and a training plan. A supplier who can explain common defects and their causes is far more likely to help you stabilize production quickly.
How can I estimate ROI for a Rigid Box Machine?
Start with three measurable inputs: current labor hours per 1,000 boxes, reject/rework rate, and changeover downtime. Then model a conservative improvement (even a small reject reduction can pay back quickly on premium packaging orders).
Next Step
If your goal is premium rigid boxes that look consistent across shifts (and not just “good enough when the best operator is on duty”), a well-matched Rigid Box Machine can turn quality into a repeatable process instead of a daily gamble.
Ready to evaluate a solution with your real box sizes and materials? Mention your target box dimensions, wrap paper type, and daily output goal,
and Wenzhou Feihua Printing Machinery Co., Ltd. can help you map the right configuration and trial plan.
For pricing, specs, and a production-focused recommendation, contact us and let’s make your next rigid box run smoother, cleaner, and more profitable.
For pricing, specs, and a production-focused recommendation, contact us and let’s make your next rigid box run smoother, cleaner, and more profitable.


